 Orimiora
ORIMIORA SUPPORT
Help
Learn Orimiora’s main operations, feature by feature.
Browse all help topics
Choose a storage destination first
After the usage guide, tap Choose destination and select a folder in Files. You can add specimens once the first save succeeds. To prepare for app deletion or device failure, we recommend an independent destination such as iCloud Drive.
Add and edit specimens
Start with a stone in your room.
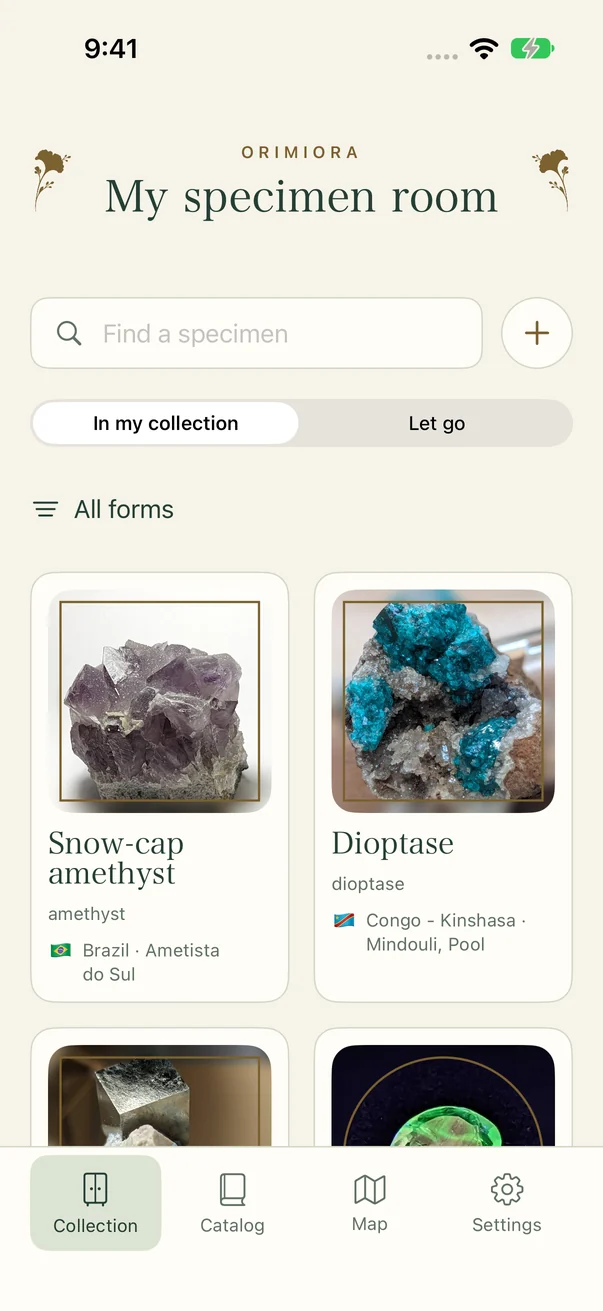
Tap + beside the search field to add a specimen. Tap a saved specimen to open its details.
Tap + to the right of the search field in your specimen room. Choose the camera, photo library, or no photo, enter a name, type, origin, and other details, then save. A management number is generated automatically and can be changed. After adding a specimen, use Edit record at the top right of its detail screen.
Open full-size screenshot ↗
Arrange photos and frames
Choose a photo and frame in the add or edit screen. Adjust the photo's position and size, then save. Original photos are stored separately from frames. You can add a photo later to a record without one.
Explore the catalog
Connect your specimen to the catalog.
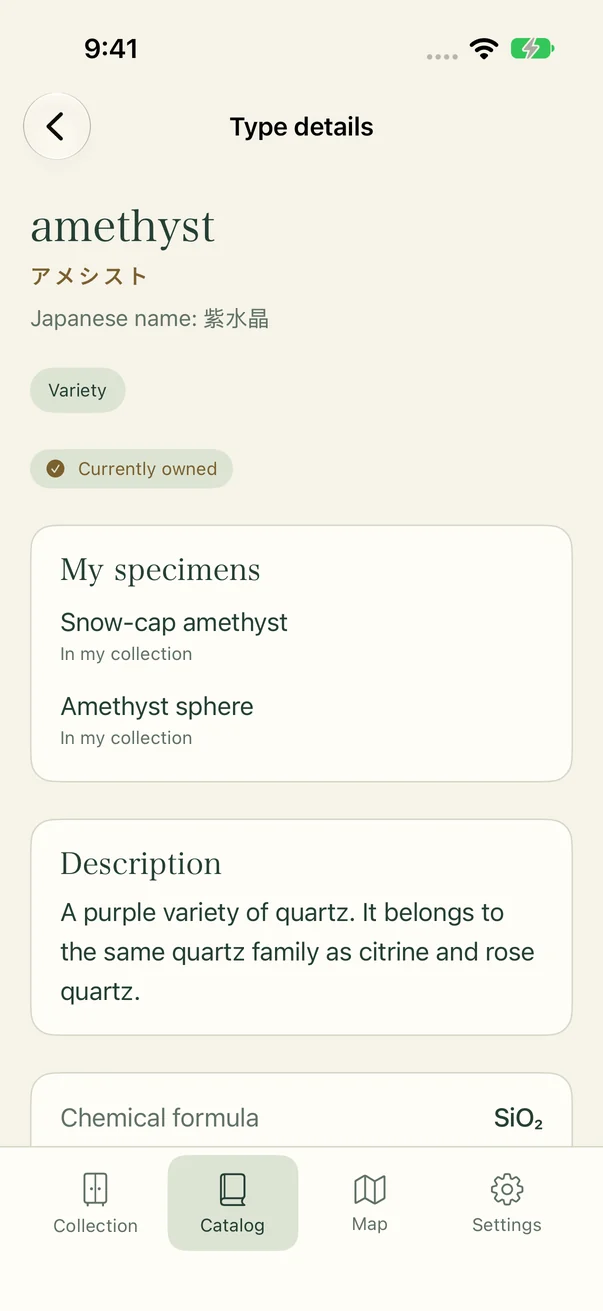
Open a catalog entry to read its description, chemical formula, hardness, and more. Set a specimen’s type to connect it to the matching entry.
Search names in the Catalog tab and open an entry to read its description and properties. All entries are available, with labels for Currently owned, Previously owned, and Never owned. Assigning a type to a specimen connects it to the catalog. Sources and general references are available under Licenses and credits.
Open full-size screenshot ↗
Record journeys and history
Your journey starts in specimen details.
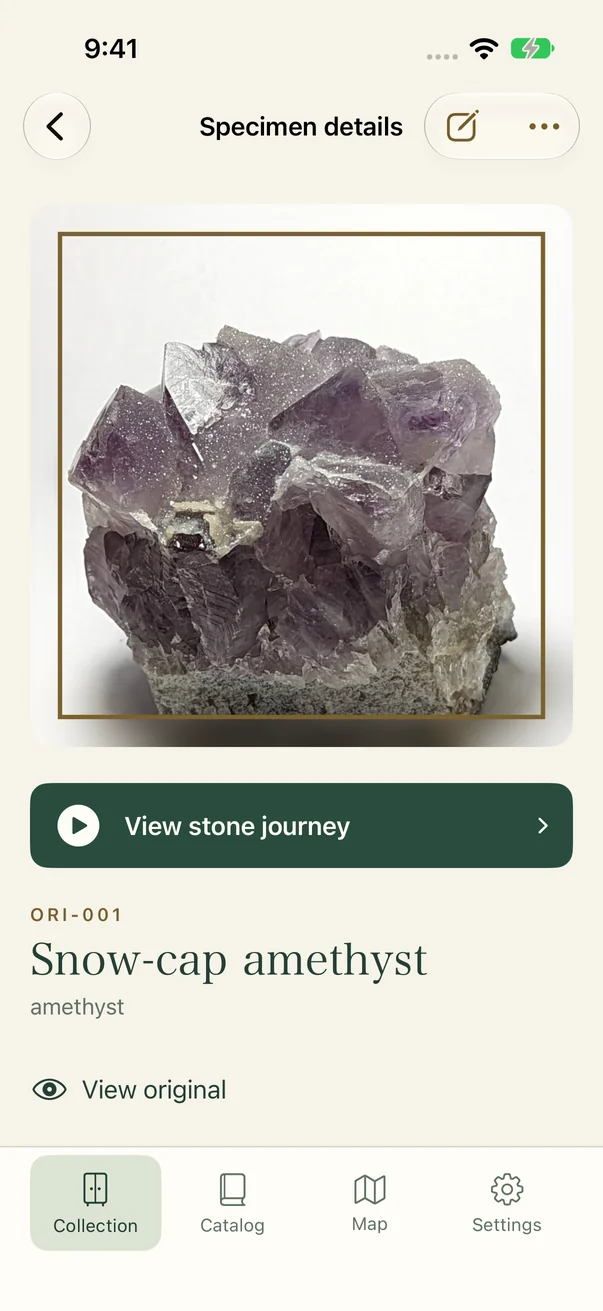
Tap View stone journey below the photo to play the route. Scroll down to find the origin and history.
View stone journey plays the route from origin through pre-purchase waypoints, purchase place, post-purchase waypoints and arrival locations. Unspecified stops are skipped. Loading maps uses a network connection.
Add events under Stone history. For a waypoint, choose Before purchase or After purchase. Stops within each stage play in the order added; unknown dates stay unknown. Arrival locations appear in shared videos, so review the places before sharing. Use the pencil to edit individual events. Changes to origin or acquisition place also update the specimen's basic details.
Open full-size screenshot ↗
Record a move
Open Settings → Move home. Your current home prefecture is used as the starting point; if none is set, choose it for your first move. Select the new prefecture and moving date, check the number of owned stones, then tap Record a move. Finish or discard any specimen draft first.
The move is added to every stone you currently own. Released stones are excluded. The new prefecture becomes your current residence and the starting point for your next move. History appears in Settings and each affected stone's history and in-app journey. It is excluded from shared images and videos. Hide personal information also hides moving history on screen.
Handle private information
Enter purchase price and store in the add or edit screen. Price appears in details but is excluded from public images and videos. Hide personal information in Settings hides home prefecture, purchase information, and other private details on screen. Include purchase store when sharing controls whether the store name is shared.
Print labels
In Prepare labels, choose multiple specimens and a label size. Create an A4 PDF and send it to a printer or save it using Share / Print. Print on A4 at 100% scale (actual size).
Let go and delete
Choose Let go from the specimen detail menu. History remains and letting go can be undone. To delete the record itself, use the bottom of the detail screen for a specimen you have let go of, and confirm deletion. App records, photos, and documents are removed, but past external backups remain.
Check save status and restore
Check external save status under Record storage in Settings. If saving fails, check the destination's connection and available storage, then retry or choose the destination again. Automatic saving while the app is closed is not guaranteed.
To restore, choose a backup file, read the preview, and import it. Divergent changes are preserved as conflicts so you can review both and choose. Backups contain purchase information and original photos; do not publish them as-is.
Screens and settings
Tap the active tab again to return to its top. Switching to a different tab preserves its open screen. Settings lets you change appearance, home prefecture, and sharing options, and revisit the tutorial and terms. Choose Automatic, Japanese, or English under App language. The selection is retained when you reopen the app.
Contact us
If you need more help, email the app version, iOS version, and the operation you are having trouble with. You do not need to attach records or original photos. Do not send secrets or unnecessary personal information.
Contact by email